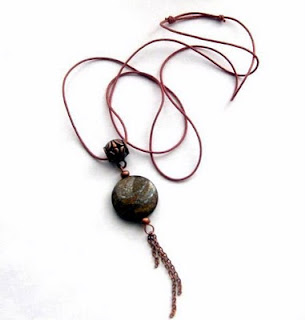
 It might not look simple at first, but if you give it a go, you will see it’s almost as easy as tying shoe laces.
First get a long length of chord. You need to cut it long enough to fit your head through it when looped, plus 8 inches more (about 32 inches or more is a decent length.) I have used a little more than is required here as I’m going to leave the loose ends a bit long for the purpose of clarity. The first time you practice this, it might be helpful to do the same and cut the ends later.
Slip your pendant, or whatever you wish to hang, onto the chord and place it in the middle. If you like, you could temporarily keep it in place with a band aid while you work on the other ends of the string.

Cross the loose ends of your chord as in the photo.

Fold one end back on itself a few inches. Again, for clarity, I have folded an inch or so more than I normally would and so I will have to trim the loose ends later.

Now bring the loose end of the folded piece away from you, back under the other strands...

...and bring it over the top of all three strands created, towards you again.

Repeat this two or three times, under and over, wrapping the loop up in the direction of the bend.

On the final wrap, pass the short loose end inside the arc of the bend. In my example, I have only wrapped 3 times so as to keep the photo as uncluttered as possible. An extra wrap will hold better though.

Now slowly pull that loose end and at the same time pull the long strand on the far side of the knot. If you tug them away from each other, the knot should be tightening. Pull them just tight enough to make a secure, neat knot. There’s a reason why I say do this slowly. If instead of tightening, the whole knot simply moves, then you are pulling the wrong bit; you are in fact, pulling both loose ends and the knot will unravel. So check first with a gently pull.

Now you are half-way there and need to repeat the process on the other side so you will have two knots that can be slid towards or away from each other.
So we are going to do it again, like a mirror image of what we did before. Bend the one remaining loose end back over the long end so that it is facing the knot.
 Bring the loose end away from you, under the loop. Then wrap it back over the top towards you again.
Repeat two or three times. (Again I have only repeated it twice for clarity.) On the final wrap, instead of bringing the loose end over the top, thread it inside and through the loop and slowly pull it tight.

You now have two knots that you can slide away from or towards each other.

You can trim the loose ends fairly close to the knot. If you wish, you could paint the ends of them with a dab of nail polish or glue to prevent fraying. Nail polish will need replacing after a while, but it is less noticeable and neater than glue. If you do use either glue or nail polish, avoid getting it on the knots themselves.
Now you can slip the pendant over your head, then pull the adjustable knots away from each other to shorten the pendant to your preferred length.

one of these days I will publish an article on the blog on the right day, at the right time and without any glitches...I got it wrong again, but close enough. Please read the post below re Dublin meet-up in August, which I knocked out of place a few hours too soon.
ReplyDeleteyes, finally a clear set of intructions - I LOVE you Amo'r (haha)
ReplyDeleteLove the article with those clear detailed instructions, and those very sharp pics! Maybe this time I'll get the hang of knotting (I'm left-handed which doesn't help...)
ReplyDeleteCan't wait to try this. I did it by accident to a necklace years ago & would never unknot it incase I couldn't get it back together.
ReplyDeletethanks girls. Letizia that's so funny!
ReplyDeletethank for tips
ReplyDelete