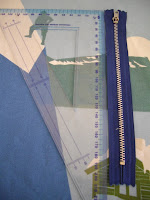
First of all... choose your zip! Whatever length you choose will be the length of your pouch so think about what you're going to use it for... Today we'll make a pencil case.
Go to your stash of fabric and choose something in a medium to heavy weight, this will help to keep the shape of your case! I find that IKEA's canvas prints are PERFECT! For this I'm going to use ANNAMOA for 5.99 a metre, you could make 34 of these from that much fabric, so half a metre will be PLENTY!
Take a ruler and measure your zip, if you have a set square it will be handy so go and have a look if you still have one left over from year 9 geometry....
Cut a square which has equal sides the length of your zip.
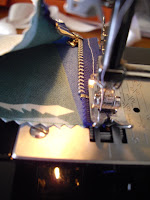
Open your zip up to about half way, then lay the zip face down on the right side of your fabric. Line it up along any of the sides, then either using your zipper foot (mine is AWOL) or a regular foot sew along the zipper so that your stitches are about 4mm from the edge of the teeth. Sew all the way along until you get to the zip pull, stop about 3cm from the pull and with the needle still in the fabric, raise the foot. close the zipper so that the pull is now behind your foot. Lower the foot and keep sewing!
Next, fold your fabric over so the zip meets the opposite side, with right sides together. Sew along this side also remembering to lift the foot and slide the zip pull out of the way when you get to it. This time you'll be opening the zip (away from you) when you get towards the end.
Once this is done, snip off any trailing threads and grab some pins for the next step.
Grab your work and flatten it out so that the zip is right in the middle, if you have a label, insert it right behind the zip and tack it into place so it doesn't move later on.
Fold in both corners, stopping just next to your zip, pin them to hold them still then sew all the way across.
Flatten out your work so that the folds you made at one end continue up to the other, pin then flat. Now you can choose if you want to add a strap - I am going to use some ribbon for this one, but you could also use some shoe lace, part of a tape measure, thin rope, or make a strap out of matching fabric.... up to you.
Drop your strap down into the case, keeping the ends tucked under your zip. Again tack then in so they don't move. Make sure you open your zip to halfway so it's easy to turn later!
Sew all the way across again! Then snip off all your trailing threads then turn your case right side out....get your fingers inside and push the corners out to make neat triangles... and you're done!!!!


Great! I can't wait to get started on mine now! Thanks Hayley ^_^
ReplyDeleteWoah, I have to save this article. I don't know how many times I have been shown to sew in a zip, I keep forgetting how! My mind just goes blank when I look at a zip!
ReplyDeleteBrilliant, thank you so much!
brilliant tutorial, thank you for sharing!
ReplyDeletewill make one soon! ^-^
Excellent tutorial! Thanks Hayley.
ReplyDeleteSuper tutorial. Very clear steps and very inspiring - now where did I put those zips!!!
ReplyDeleteThank you, Carol :)
Thanks Hayley, this is a great tutorial. I so want to make items with zips and have been scared to tackle them! Great tutorial and very helpful.
ReplyDeleteFi
Clear & concise instructions - love it Hayley! thanks ;)
ReplyDelete